Welcome to The Real Blogger Status - Beta. Please note the warnings (as of 6/13: 0 active), and the alerts (as of 1/10/2007: 5 active).

Please be aware of the naming variances in this blog. You will find various references to "Classic" / "Old Template 2006" Blogger, and to "Beta" / "New Template 2006" Blogger.
Showing posts with label How Do I. Show all posts

Thursday, November 30, 2006

Blog Ownership Stuck With The First Google Account? Don't Delete It

(Edit 6/13): This is no longer an issue. Note: deleting the owner account is still a bad idea. But you shouldn't even get that far in frustration, because we now have the ability to transfer blogs from one account to another.

Under Classic Blogger, it was possible to transfer a blog from one administrative account to another, by adding the second account, then deleting the first. Incorrectly done, though, you could end up with a blog with no administrator, and no way to add an administrator. And another trouble ticket for Blogger Support to resolve.

So Blogger changed the possibility, with New Blogger 2006. Under New Blogger, you can add a second (or third, or ...) administrator, but you can't delete the first administrator. That takes care of the possibility of having no administrator. But it creates a second problem (which apparently Blogger doesn't find important) - you can end up with an account that has no need to administer a blog, but having been the first administrator, is stuck with that ability none the less.

Having accepted that fact, one bright person came up with the idea

OK, what if I delete the first account?

A drastic, but seemingly effective way to resolve the problem.

But no, that's not an answer at all. When you delete the original administrative account, the blogs associated with that account disappear. This is stated by Blogger Employee, in Blogger Help Group: Something Is Broken Since switch my blogs aren't on dashboard Help blogstars or Employee.
...the problem appears to be that you deleted the Google Account that these blogs were registered with. Be aware, when you delete your account, your blogs go with it.

In other words, do not delete an account having any blogs associated with it. And keep the account, and email address, current - and do not lose the password.

Removing the owner account from administrative status won't have the same effect as deleting that account - your blogs aren't going to vanish. But it won't force a second administrator to become the new owner, either. And if the second administrator isn't properly setup, you could end up with a blog with no administrator.

This advice comes too late for some. Let's hope that Blogger produces a workaround for the ownership transfer problem very quickly - expecting for any one account to remain as the owner of a given blog, for eternity, makes no sense at all. People do change names, and identities, and blogs do change ownership.

So, did you just delete your blog? Better get to work, now. And, whether you're reading this too late, or if I caught you in time, tell Blogger that this needs to be changed.

>> Top

Wednesday, November 29, 2006

Backup Your Blog - Beta

I use, and recommend, HTTrack to mirror your blog. HTTrack is very versatile, and will copy any number of blogs, or other websites, in one job, making the contents of each website accessible as if it was an online access, from any mirrored website.

Unfortunately, HTTrack mirroring may be problematic with Blogger Beta. When I started using HTTrack, I could back up a couple of my blogs in 5 - 10 minutes. I added more blogs to the backup job, and backup time went up to 1/2 hour or so, and used 100M or so of disk space. Still a neglible amount of time and disk space, considering the results.

As I started developing this blog, and especially when I started using labels in my posts, backup time and disk space increased dramatically. The last mirror that I ran was 2 weeks ago - it took 14 hours, and used 3.7G of disk space.

Today, in a comment for Backup Your Blog, I see

Well, i tried to use HTTrack but unfortunately it goes looping and tries to download over 200 MB of content, which my blog never has, as i only have 80+ posts.


I went searching for a solution, and in the HTTrack forum, I found one query, Blogger Beta Problems

i try to mirror my Blogger Beta blog but somehow there are some problems related to this task. If i just mirror it without any additional settings then it starts downloading about 200MB worth of sites, mirroring the index file many times but with different number codes (e.g. index25987.html), also there is a folder 'feeds' which keeps growing during the process, filling up quickly.

followed by
i too am having problems, only since i upgraded to beta blog. now it takes up to 90 minutes, & still is not complete, the no of files updated gets to a certain % then startes to decrease instead of increase & i am getting virtual memory errors.

I don't think that this is, necessarily, a design problem in HTTrack. I did spend some time looking thru the Options in the HTTrack job, and I am fairly certain that there is a setting in there that will be relevant to the problem. Finding that setting, though, could be easier with an HTTrack expert.

I hope that one becomes available soon.

Monday, November 27, 2006

Using Background Images

Background images make the blog so much more colourful than plain old solid colour backgrounds. A background image

  • Is not clickable.
  • Shows up only where no foreground content is present.


(Note): This post has been migrated to (and improved in) The Real Blogger Status: Background Images In Your Blog.

Look at using a background image under the text title, for instance. Note that this is the opposite from replacing the text in the title with a picture. If you put a picture in the title, no background will be visible, unless you intentionally make the picture too small for the title space, or use a transparent .gif file for an image.

We do this using CSS rules. Look in the template for
#header-wrapper {
width:660px;
margin:0 auto 10px;
border:0px solid $bordercolor;
}

Change that to
#header-wrapper {
width:660px;
margin:0 auto 10px;
border:0px solid $bordercolor;
background: url(http://whatever.wherever.com/what.gif) no-repeat 0px 0px;
}

The CSS object "header-wrapper" is the Beta standard name for the screen area which will contain the text blog title and blog description. If you have, separately, tweaked your header, any of the above settings may differ. Just add the "background" rule.

If you have a Classic blog, your template may or may not use a CSS rule to define the header. It may or may not use a CSS object "header-wrapper". Be aware of the possibilities. You could, conceivably, have a <div> tag, with all of the rules defined there in the HTML.
<div style="width:660px; margin:0 auto 10px; border:0px solid $bordercolor;"> ... </div>

if so, change that to
<div style="width:660px; margin:0 auto 10px; border:0px solid $bordercolor;background: url(http://whatever.wherever.com/what.gif) no-repeat 0px 0px;"> ... </div>


You can apply a background image to any area in the blog, not just the header.
body {
...
background: url('whatever.wherever.com/what.gif');
...
}

With any large screen area, your image will probably be smaller than the area being covered. You'll probably not use "norepeat", so your background image gets reused, repeatedly, in a checkerboard pattern, over the entire area.

For more information, see the W3Schools tutorial: CSS Background

Migrating A Custom Object In The Classic Template

Most custom objects in your Classic Blogger template are coded in plain old HTML / JavaScript.

Migrating a custom object like that is easy. Just create a new HTML / JavaScript page element, in the Page Layout editor, and copy the code, word for word. Place and size it as you like, and you're done.

But watch out! Some custom code comes in two, or more sections. I've seen some custom code with variable definitions at the top of the template, and the actual HTML at the bottom. Make sure that you find all of the code required! And minimise the stress - test your code before you migrate the production blog!

A single object, say SiteMeter, could be dropped right into a new HTML / JavaScript page element, as is, right from the SiteMeter wizard. Here's a few examples.

OK, I shortened a few lines, with "********", and inserted line breaks, to prevent the old post / sidebar alignment problem.

<!-- Site Meter --><script src="http://s26.sitemeter.com/js/counter.js?site=********" type="text/javascript"></script><noscript><a href="http://s26.sitemeter.com/stats.asp?site=********" target="_top"><img border="0" alt="Site Meter" src="http://s26.sitemeter.com/meter.asp?site=********"/>
</a></noscript>
<!-- Copyright (c)2006 Site Meter -->


If I want to get fancy, I use nested tables, and put the SiteMeter and StatCounter code side by side.

<table border="0" align="center"><tr><td><table><tr><td width="33%"><!-- Site Meter --><script src="http://s26.sitemeter.com/js/counter.js?site=********" type="text/javascript"></script><noscript><a href="http://s26.sitemeter.com/stats.asp?site=********" target="_top"><img border="0" alt="Site Meter" src="http://s26.sitemeter.com/meter.asp?site=********"/>
</a></noscript>
<!-- Copyright (c)2006 Site Meter --></td><td width="33%"><script language="javascript" type="text/javascript">var sc_project=********; var sc_invisible=0; var sc_partition=16; var sc_security="********"; </script><script language="javascript" src="http://www.statcounter.com/counter/counter.js" type="text/javascript"></script><noscript><a href="http://www.statcounter.com/" target="_blank"><img border="0" alt="website hit counter" src="http://c17.statcounter.com/counter.php?
sc_project=********&java=0
&amp;amp;amp;amp;amp;amp;amp;amp;amp;
security=********&invisible=0"/></a> </noscript><!-- End of StatCounter Code --><br/><a href="http://my.statcounter.com/project/standard/stats.php?
project_id=********&guest=1"
>View My Stats</a></td></tr></table></td></tr></table>
Here's how to make a 3 object page element, in the footer, like the one in Googolians - The Blog.
<table border="0" align="center"><tr><td width="90%"><table><tr>
<td width="33%">(whatever you want, in the left cell)</td>
<td width="33%">(whatever you want, in the centre cell)</td>
<td width="33%">(whatever you want, in the right cell)</td>
</tr></table></td></tr></table>


I know there are other possibilities. Try them. Have fun.

For more information about Tables, see the W3Schools tutorial HTML <table> tag.

Sunday, November 26, 2006

Editing Labels

I know that I've said this before, but the Labels feature in Beta Blogger totally rocks. Having said that, though, I will note one problem. There is no way to edit a label, short of editing each post, one by one, and changing the label field. Change the problem label, by retyping it.

That's slow and tedious.

But - that's not the only way to change a label. From the Post Editor menu, that under Classic Blogger just listed the posts, and let you view or edit one, you can now also

  • Identify all posts with a given label.
  • Select all, or some posts listed.
  • Add a new label to posts selected.
  • Delete a label from posts selected.


In Blogger Help Group: How Do I? Add and Delete Labels, we see the question
I have three "label" categories on my blog and for some reason I had two of them capitalized and one lower case. Not a big thing, but it was bugging me. I picked the label with the fewest posts in it and went back to write the label in properly, but it kept reverting to the lower case label. I finally figured out to go back to those posts, delete the label (the lower case one that was bugging me) and republish. Luckily I had only one post on that label. I checked the blog and the offending label was gone. Then I went back and edited the post again typing the label correctly and it appeared correctly on the blog. If anybody knows an easier way to do this, it is bound to help somebody.

Actually, using the Post Editor labels list, you could edit any label in a couple minutes, irregardless of how many posts used that label.
  1. Identify all posts with the problem label.
  2. Add a new temporary label to all posts identified.
  3. Identify all posts using the temporary label.
  4. Delete the problem label from all posts identified.
  5. Add the corrected label to all posts identified.
  6. Delete the temporary label from all posts identified.

Sound complicated? Maybe, but it will take maybe a couple minutes to do all of it, with no risk of missing even one post. Each of the above steps involve simple mouse clicks, with minimal typing, and are done once only, in that sequence. If you have lots of posts with a given label, this will automate the process, and do it with way less stress and irritation.

Wednesday, November 22, 2006

No More Previous Posts

The old 10 Previous Posts list is no more. Knowing that a blog was originally designed as a journal, it made sense that any post would link to previous posts only. You can't predict the future. But the limitation of 10 posts always bothered me, as it did many Bloggers. And every month, somebody would ask

  • How do I get a list of more than 10 posts?
  • How do I get a list of previous posts, in reverse order?
  • How do I get a list of the 10 earliest posts?


So now, previous posts is combined with the archives. And you can see a list of all posts, in any one of three styles.
  • A collapsible hierarchy.
  • A flat list.
  • A dropdown menu.


Each of the styles can list the selections in reverse order (oldest first). Each can display by month, by week, or by day. And the first, hierarchy, even has an option to display post titles, ie table of contents, with chapters by date. No more muttering to yourself
Now, I know I wrote that post sometime last month - but what did I call it?


So, as I described it elsewhere, it's not
New Blogger doesn't have a previous posts list.

It's
New Blogger doesn't need a previous posts list.


So How Do I Use This New Feature?
Adding the Previous Posts, in a Classic blog, required you to edit the template. With a New Blogger blog, properly migrated, you simply go to Page Elements, under Template. Then add another page element, a Blog Archive, and configure it as you like.

My Blog Archive is called "Other Articles", and is selected as
  • Hierarchy.
  • Show Post Titles.
  • Archive Frequency: Monthly
  • Date: 2006 and Month: January (this is key in the collapse mechanism).
Configure yours as you prefer. Experiment with different possibilities, and find which suits your needs.

Monday, November 13, 2006

Putting A Post At The Top (A "Welcome" Post) - Beta

Layouts template Blogger blog posts are sequenced as Classic Blogger blog posts - by date, in reversed sequence. This means, again, that the newest post will fall at the top, and every time that you make a new post, it will be visible above any previous posts.

Just like a Classic blog, you can make the posts display in any order that you like - just change the date of each post. This is called a work around. With a blog of any size, and activity, you'll note that it is a very painful one.

In a Layouts blog, though, we have one improvement. You can create a special post, and have it "pinned" to the top of the blog. I created a brief Welcome message, which is at the top of this blog, just below the header, but centered like a post.

When you're in the Layout Editor, select "Add a Page Element". Select an HTML / JavaScript, or a Text, element. You can create content using either Rich Text, or HTML, at your convenience. After you create your new element, you can drag and drop it anywhere in the layout - at the top of the post column, or the sidebar, or even at the bottom of the post column.

Positioning a new page element, using the layout editor, can require some experimentation. When you move the new element over the area where you would like it to be, it may drop centered on, another area of the blog. When it does this, move it ever so gently in the right direction, a couple pixels or so, until it positions properly. When it is positioned where you want it, release it, and it will fall into place, properly positioned and sized.

>> Top

Wednesday, October 18, 2006

Authentication - And Changing The Account On Your Blog

(Edit 6/13): Changing the owner account is still not a casual process. But it can now be done.

Neither Classic or New Blogger have a simple setting to change the administrator account on your blog. There's nothing in Settings that says

Manage this blog from this account.

As I note in The Real Blogger Status (Classic): Changing The Account Name On Your Blog, though, this is not a great problem. Simply add a new administrator, then delete the old one.

Under Classic Blogger, this could be done in one step, and this was a problem. It was possible to make a new member an administrator, and end up with no administrator. This would require another ticket to Blogger Support. DOHH.
Please restore my administrator status. My blog has no administrator.


In New Blogger, this is a problem, possibly intentionally so because of the latter scenario.
  • Add a new blog member.
  • The new blog member accepts the addition.
  • Make the new member an administrator.
  • The new blog administrator cannot, unfortunately, remove the old administrator.


And there's the problem. You have one account that can't be deleted from administrator status. And, in Blogger Help Group: How Do I? Switching Blog to anothe rgmail account?, we see this problem. And note the warning: do not delete the owner account, in an attempt to force ownership upon a second account. You'll end up with no blog.

This is just one of the many details that needs to be fixed, in New Blogger. Let's tell Blogger that this is a major concern.

>> Top

Wednesday, September 13, 2006

Template Editing

Along with Labels, the Beta template editing ability is probably the neatest feature in Blogger Beta. The GUI Page Layout editor is totally kewl.

Not too many folks realise though that you can edit page elements from other than Page Layout editor mode. When we're logged in as an administrator, we can make changes to the individual page elements, just as we can edit posts. Similar to the "Edit Posts" pencil at the bottom of each post, you'll find the "Edit" widget at the bottom right of every page element.

And here's some confusion.

How in the world do I get rid of the cute little dragonflies that seem to be a part of the template that I have?? I do not know enough about the HTML to find them or what they might be called.

Well, I've been studying the HTML / XML, but I don't know the name myself. It does sort of look like a dragonfly, though. It's just another thing that got put, into Blogger Beta, without a name. Another violation of one of my principles
Everything gets a name.

Fortunately, named or not named, it's only visible to you, in a specific situation. And, once you explain that to folks, the general philosophy is
I can live with that, as long as the readers aren't seeing it.

And they're not seeing them. Only you can see them, in a specific situation.
  • When you are logged in to the blog as an administrator.
  • When the blog has Quick Editing enabled.


There are 3 ways to prevent the dragonflies from displaying.
  1. Log out from your account.
  2. Disable Quick Editing.
  3. Edit your template.
    1. Backup your template.
    2. Select "Expand Widget Templates".
    3. Find, and replace, all instances of
      <b:include name='quickedit'/>
      changing each to
      <!-- <b:include name='quickedit'/> -->
    4. Save Template changes.


(Note): You may find it necessary to clear browser cache, after doing the above, to make sure the dragonflies will be gone.

Labels

To put it simply, this feature rocks.

Here's a dynamic search for all posts about Beta Problems (label "beta problems"), in this blog. Why dynamic? Because it's evaluated each time that you click on the link (possibly within limits of your cache).

And instead of an ugly search hit list, where you get snippets of useful information, that you have to hunt for (ever try finding an article title, or the URL, in a typical search hit entry?), you get a customised main page view of your blog, with all of your customised amenities and layout, showing only the posts relevant to the label selected. Very user friendly.

And look at the end of this post. See the labels listed? Click on any one. Yep - another dynamic search - on that label. Keyword cross referencing.

To add them, just type any keywords, as desired, into the box at the bottom of the post edit window. They aren't case sensitive, so just lower case, comma delimited, as many as relevant for any post. And as you type, you'll get a popup menu of already entered labels, so you can pick ones already in use when possible. No misspelled labels. When you feel the need to change any, just add, change, or delete words, in the list, in each relevant post.

There's even a selection to the right of the Labels box, called "Show all". That opens a cloud display, showing all labels defined, for all of the posts in that blog. Just click on each relevant label, and it gets added to the list for that post. What could be easier?

Start using labels early, while your blog is young. It's easy to type in 2 or 3 keywords, into the labels field, whenever you add or update a post. When you have a couple dozen posts, and have to add the labels then, it won't be quite so much fun. I speak from experience here.

When you have labels defined for your posts, you have numerous options for referencing them.

  • Already there for you - the labels menu at the end of each post.
  • In the sidebar, or at the bottom, you can add a Page Element, listing the labels in your blog. You can, of course, rename the list - mine are called "Topics aka MultiStyle Labels". Or you can forget about the plain one style label list, and go straight to MultiStyle Labels.
  • You can have a feed for each label.
  • You can even have a link, in the post. Look here for other posts about How Do I Use Various Beta Features, as an example.


Now, for the next step in the evolution of The Real Blogger Status - Beta, check out MultiStyle Label Lists, courtesy of HackOSphere and CumulusBlogs.

Wednesday, September 06, 2006

Customising The Header #2

Replacing the boring text title in your blog is easy enough. Making it look really pretty is easy - when you know how.

Removing the header element in a Beta blog is not too hard. Replacing the template entry, or adding a new header page element, isn't terribly difficult. But some templates require just a bit more work. if you want to do a good job.


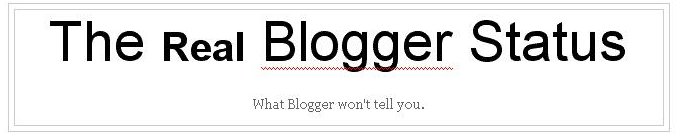
I started out with a plain text header, the default for Minima, in a pair of ugly boxes.


I replaced the default blog header with an HTML page element.


<a href="http://bloggerstatusforrealbeta.blogspot.com/index.html"><img border="0" src="http://photos1.blogger.com/blogger2/560/527000594325287/
1600/RBS%20Header%201.gif"/></a>
<p align="center">What Blogger won't tell you.</p>

The graphic content is nicer, but still the ugly boxes.


I then had to edit the template HTML.

I found the code for the Blog Title.
<div id="header">
<a name="Top"></a>
<h1 id="blog-title">
<ItemPage><a href="<$BlogURL$>"></ItemPage>
<$BlogTitle$>
<ItemPage></a></ItemPage>
</h1>
<p id="description"><$BlogDescription$></p>
</div>


That shows that I have 3 containers - "blog-title", "description", and "header" - to examine. Two containers = "blog-title" and "description" - are peers, and together make one box. That one box is enclosed by "header", which is the second box. And there are the 2 ugly boxes.

The rules, for each container, are in the Header section of the blog header code.

/* Header
----------------------------------------------- */
@media all {
#header {
width:660px;
margin:0 auto 10px;
border:1px solid #ccc;
}
}
@media handheld {
#header {
width:90%;
}
}
#blog-title {
margin:5px 5px 0;
padding:20px 20px .25em;
border:1px solid #eee;
border-width:1px 1px 0;
font-size:200%;
line-height:1.2em;
font-weight:normal;
color:#666;
text-transform:uppercase;
letter-spacing:.2em;
}
#blog-title a {
color:#666;
text-decoration:none;
}
#blog-title a:hover {
color:#c60;
}
#description {
margin:0 5px 5px;
padding:0 20px 20px;
border:1px solid #eee;
border-width:0 1px 1px;
max-width:700px;
font:78%/1.4em "Trebuchet MS",Trebuchet,Arial,Verdana,Sans-serif;
letter-spacing:.2em;
color:#999;
}


There are a total of 5 relevant rules, in my case.
#header
border:1px solid #ccc;
#blog-title
border:1px solid #eee;
border-width:1px 1px 0;
#description
border:1px solid #eee;
border-width:0 1px 1px;


I changed all "1px" to "0px".

/* Header
----------------------------------------------- */
@media all {
#header {
width:660px;
margin:0 auto 10px;
border:0px solid #ccc;
}
}
@media handheld {
#header {
width:90%;
}
}
#blog-title {
margin:5px 5px 0;
padding:20px 20px .25em;
border:0px solid #eee;
border-width:0px 0px 0;
font-size:200%;
line-height:1.2em;
font-weight:normal;
color:#666;
letter-spacing:.2em;
}
#blog-title a {
color:#666;
text-decoration:none;
}
#blog-title a:hover {
color:#c60;
}
#description {
margin:0 5px 5px;
padding:0 20px 20px;
border:0px solid #eee;
border-width:0 0px 0px;
max-width:700px;
font:78%/1.4em "Trebuchet MS",Trebuchet,Arial,Verdana,Sans-serif;
letter-spacing:.2em;
color:#999;
}


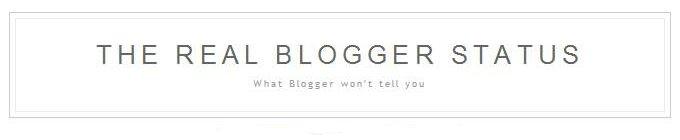
And no more ugly boxes.

Want more ideas? How about using background images (aka wallpaper)?

Tuesday, September 05, 2006

Customising The Header In A Beta Blog

Earlier, I wrote about how to Restore The Main Page Link To The Title, in a Beta blog. That was a hack, and a messy one at that. Blogger fixed that little omission, so it's no longer necessary. The blog title is now clickable, and links back to main page view - in a blog with default setup - just as it did for a Classic blog.

But it's still boring text - a title, followed by a description.

So some will ask

How do I customise my blog header? How do I (for instance) replace the boring text title with a picture?


You can make this change as you would in a Classic blog, if you wish to edit the template HTML. Personally, I use the GUI Page Layout editor.

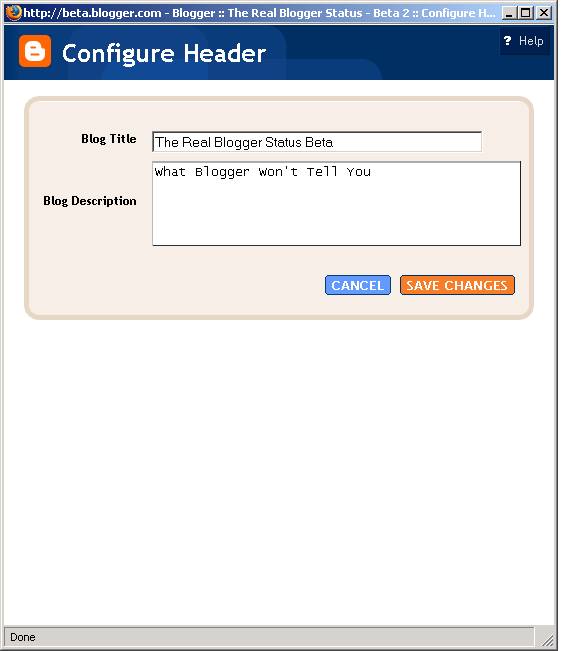
Go into Template - Page Elements. Edit the Blog Header element.

You have several choices here, with the Blog Header.
  1. Put code into the Blog Title field. You could put both a link and an image into there
    <a href="http://bloggerstatusforrealbeta.blogspot.com/index.html">
    <img border="0" src="http://photos1.blogger.com/blogger2/
    560/527000594325287/1600/RBS%20Header%201.gif"/></a>

    except for one major problem. It just won't fit.
  2. You could put the code into the Blog Description, except for another limitation. You can't have a blank Blog Title field. If you put your header code into Blog Description, what can you put into Blog Title that doesn't look tacky?
  3. I prefer to get rid of the Blog Header altogether, and replace it with a straight HTML page element.
  4. You could remove the Blog Header, and replace it with a background image.
See my article The Real Blogger Status: What's In The Header or How Do I Keep My Blog Searchable? for more discussion about this issue.


If you're lucky, you can just remove the Header page element.


If not, you won't be able to remove it, immediately.


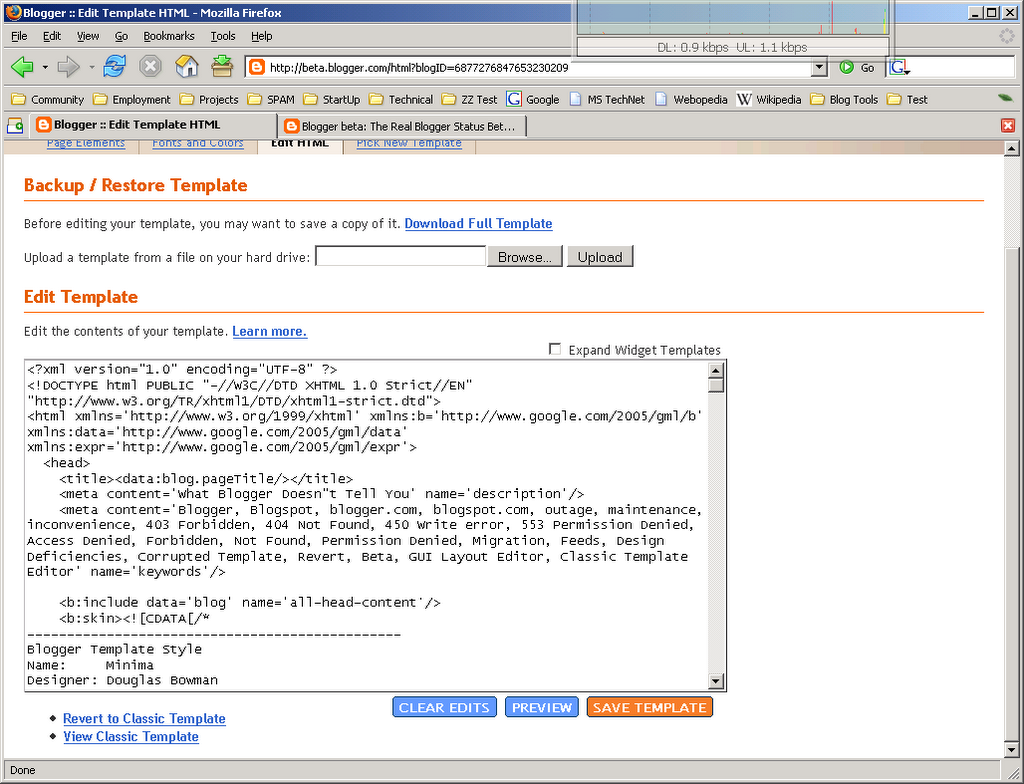
If you see the second image - ie no "Remove Page Element" button, go to Edit HTML. Find the section of code


<div id='header-wrapper'>
<b:section class='header' id='header' maxwidgets='1' showaddelement='no'>
<b:widget id='Header1' locked='true' title='The Real Blogger Status Beta (Header)' type='Header'/>
</b:section>
</div>


and change "locked='true'" to "locked='false'".

<div id='header-wrapper'>
<b:section class='header' id='header' maxwidgets='1' showaddelement='no'>
<b:widget id='Header1' locked='false' title='The Real Blogger Status Beta (Header)' type='Header'/>
</b:section>
</div>


Then Save Template. Go back to Page Elements.


Now you can just remove the Header page element.


Now, just add a Page Element - HTML. Put whatever code you wish, in the body of the element.


<a href="http://bloggerstatusforrealbeta.blogspot.com/index.html"><img border="0" src="http://photos1.blogger.com/blogger2/560/527000594325287/
1600/RBS%20Header%201.gif"/></a>
<p align="center">What Blogger won't tell you.</p>


The added element will be in the sidebar, or the footer (wherever you created it), so grab it, drag it, and drop it into place atop the blog, where the Header element used to be.

Positioning the new header will require some experimentation; when you move the new element over the area where the header should be, it may drop centered on top of the post column. When it does this, move it ever so gently upwards a couple pixels or so, until it positions properly. When it is properly positioned, release it, and it will fall into place, properly positioned and sized.

Save the changes to the Layout.

Now add or update the meta tags, in the blog header. This gives you an attractive entry in a search hit list.

And finish the job properly - remove the ugly boxes, that are placed around the header by most default templates.

(Edit): In case you're wondering, making the header itself was easy, and involved no expensive software.
  • I used Microsoft Word to make the characters.
  • I did a Print Screen (Alt-Print Screen) to copy the image to the clipboard.
  • I pasted the image into Paint.
  • I saved the image as a .bmp file.
  • I used Irfanview (freeware) to trim the image, resize it, and make it into a .gif with a transparent background.

Monday, September 04, 2006

Backup Your Template - Beta

As I told you earlier, in Backup Your Template (Classic), you should always keep a copy of your template local to your computer, just as you should always keep a complete copy of your blog itself. That advice hasn't changed for Beta version blogs; if anything, it's more necessary.

The good news is - Blogger now recognises that need. The Template Editor ("Edit Template HTML") now includes a pair of scripts to save and restore the template, as needed. It's a bit more user friendly than starting Notepad each time. If you have a blog published on Blog*Spot (no externally FTP published blogs), and you're using a Layouts template, go to Template - Edit HTML. Point the template save / restore wizard into the right folder, select a file / file name, and hit Open.


Select Download Full Template to Save the template. Hit Browse to select a file to Restore the template from, then Upload to do the restore. What could be easier?


Before you make any changes to your template, back it up. If you decide that you don't like your changes, instead of spending time fixing each change, just restore from backup. Short term result - simple, on the fly changes. Long term result - more progress in making changes, and a more pleasing blog for your readers.

>> Top

Sunday, August 27, 2006

Migration From Blogger Classic To Blogger Beta

I have several Blogger blogs, among the various websites and other web presences that I maintain. Two of my biggest blogs - PChuck's Network, and The Real Blogger Status - simply can't be migrated, given the current level of problems, and of design deficiencies, in Blogger Beta. The latter blog, which I call RBS, absolutely won't be migrated until there are no more Classic blogs. Maybe it won't be migrated at all.

How can I continue, without developing RBS, even after everybody else takes the plunge and moves forward? Simple - I have RBS Beta, in addition to RBS Classic. RBS Beta will contain all issues specifically related to Blogger Beta. Now eventually, RBS Beta will contain most of the content that I write, relevant to blogging. But RBS Classic isn't going to disappear.

I'll retain both blogs, and in the tradition of the web, use static hyperlinks between the two, in various mirrored posts. And I'll use dynamic digests, from syndicated feeds. Portions of the most current 5 to 7 posts, in either blog, will be visible in the other.

I used FeedDigest, which takes the syndicated (Atom) feed from each blog, creates a custom feed with the title and a small amount of content, from each post, and makes a small feedlet in javascript. I put the feedlet from each blog, into the template of the other.

  • I setup RBS Classic, and added a feed from RBS Beta.
    • Into the template (editing the HTML) for RBS Classic, I put the FeedDigest feedlet from RBS Beta.
    • I installed that into the footer of the blog, right below the end of the posts.
    • I put an anchor tag at the top of the footer.
    • In the Sidebar, under Key Articles, I added a link labeled "Real Blogger Status - Beta Feed", which jumps me straight to the anchor tag, and to the bottom of the page.
    • See the details, if you like.
    • .
  • I setup RBS Beta, and added a feed from RBS Classic.
    • Into the template (using the GUI Page Layout editor) for RBS Beta, I added a Page Element (HTML/Javascript), in the footer.
    • The FeedDigest feedlet went straight into the new page element, which was placed right after the bottom of the posts.
    • I put an anchor tag at the top of the page element code, in the title of the element.
    • In the Sidebar, under Links, I added a link labeled "Real Blogger Status - Classic Feed", which jumps me straight to the anchor tag and the bottom of the page.
    • See the details, if you like.
    • .
The dynamic feeds will simply complement the static links. I use a lot of static links in all of my blogs. Without hyperlinks, my blogs would be a bit less useful.

In some IT migration strategies, this is called a bridge. I suspect that this looks complicated, at first glance. It was simpler to do, than to write about. The whole job took maybe an hour. Writing this, with the examples, took an entire evening, and then some.

Migration Feed Example - RBS Classic, with a feed from RBS Beta

I setup an account at FeedDigest, and created a custom feed from The Real Blogger Status - Beta.
  • Here's the code provided to me by FeedDigest.
    <script type="text/javascript" src="http://app.feeddigest.com/digest3/UZULGEIPQN.js"><noscript><a href="http://app.feeddigest.com/digest3/UZULGEIPQN.html">Click for "The Real Blogger Status".</a> By <a href="http://www.feeddigest.com/">Feed Digest</a></noscript></script>

  • Here's what it looks like, coded in the template of The Real Blogger Status - Classic (with various line breaks added, to prevent the old post / sidebar alignment problem).
    <hr />
    <p align=center>
    <a name="BridgeFeed"><strong>
    The Real Blogger Status - Beta</strong></a>
    </p>
    <p>
    <script type="text/javascript" src="http://app.feeddigest.com/digest3/UZULGEIPQN.js">
    <noscript><a href="http://app.feeddigest.com/digest3/UZULGEIPQN.html">
    Click for "RBS Beta7".</a> By <a href="http://www.feeddigest.com/">
    Feed Digest</a></noscript></script>
    </p>
    <hr />

  • Here's what it looks like, at the bottom of The Real Blogger Status - Classic.


Migration Feed Example - RBS Beta, with a feed from RBS Classic

I likewise created a custom feed from The Real Blogger Status - Classic.
  • Here's the code provided to me by FeedDigest.

    <script type="text/javascript" src="http://app.feeddigest.com/digest3/PEXJUYD3JV.js"><noscript><a href="http://app.feeddigest.com/digest3/PEXJUYD3JV.html">Click for "The Real Blogger Status".</a> By <a href="http://www.feeddigest.com/">Feed Digest</a></noscript></script>

  • I created a HTML / Javascript page element, using the Beta Layout Editor, and added that to the bottom of the page. I copied the FeedDigest code into the new element.

  • Here's what it looks like, at the bottom of The Real Blogger Status - Beta.

Sunday, August 20, 2006

Know Your Visitors - Beta

This is dead easy.


Adding the code is simple. Go to Template - Page Elements. You can add a separate page element with the code for each meter, or you can arrange the meters (and other miscellaneous objects) side by side in one page element. Look at the bottom of the page on The Real Blogger Status - Beta, and on Googolians - The Blog. See the SiteMeter and StatCounter objects?


(Note): This post has been migrated to (and improved in) The Real Blogger Status: Know Your Visitors.


Well, a single object, say SiteMeter, could be dropped right into a new HTML / JavaScript page element, as is, right from SiteMeter. OK, I shortened a few lines, with "********", and inserted line breaks, to prevent the old post / sidebar alignment problem.

<!-- Site Meter --><script src="http://s26.sitemeter.com/js/counter.js?site=********" type="text/javascript"></script><noscript><a href="http://s26.sitemeter.com/stats.asp?site=********" target="_top"><img border="0" alt="Site Meter" src="http://s26.sitemeter.com/meter.asp?site=********"/>
</a></noscript>
<!-- Copyright (c)2006 Site Meter -->
But, if I want to get fancy, I use nested tables, and put the SiteMeter and StatCounter code side by side.

<table border="0" align="center"><tr><td><table><tr><td width="33%"><!-- Site Meter --><script src="http://s26.sitemeter.com/js/counter.js?site=********" type="text/javascript"></script><noscript><a href="http://s26.sitemeter.com/stats.asp?site=********" target="_top"><img border="0" alt="Site Meter" src="http://s26.sitemeter.com/meter.asp?site=********"/>
</a></noscript>
<!-- Copyright (c)2006 Site Meter --></td><td width="33%"><script language="javascript" type="text/javascript">var sc_project=********; var sc_invisible=0; var sc_partition=16; var sc_security="********"; </script><script language="javascript" src="http://www.statcounter.com/counter/counter.js" type="text/javascript"></script><noscript><a href="http://www.statcounter.com/" target="_blank"><img border="0" alt="website hit counter" src="http://c17.statcounter.com/counter.php?
sc_project=********&java=0
&amp;amp;amp;amp;amp;amp;amp;amp;amp;
security=********&invisible=0"/></a> </noscript><!-- End of StatCounter Code --><br/><a href="http://my.statcounter.com/project/standard/stats.php?
project_id=********&guest=1"
>View My Stats</a></td></tr></table></td></tr></table>
Here's how to make a 3 object page element, in the footer, like the one in Googolians - The Blog.
<table border="0" align="center"><tr><td width="90%"><table><tr>
<td width="33%">(whatever you want, in the left cell)</td>
<td width="33%">(whatever you want, in the centre cell)</td>
<td width="33%">(whatever you want, in the right cell)</td>
</tr></table></td></tr></table>
I know there are other possibilities. Try them. Have fun.